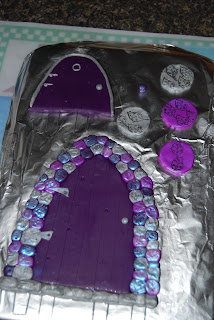
(First, here's a little sneak peak of what I accomplished by making many of my own features.)
One of the struggles I had was finding just the right door for my Fairies to enter into their new home. I didn't relish paying $25 for the doors that came the closest to what I wanted. I did find some on eBay and Etsy that I could purchase. They were handmade, and could be made to order. Wait a minute. Handmade? If they were handmade, why couldn't it be my hands to make it!? I found several tutorials online that were helpful.
I made a trip to Hobby Lobby to buy some essentials. (I like
to frequent Hobby Lobby as I respect the fact they are closed on Sunday's so
their employees can go to church and spend time with family; a philosophy that
has almost disappeared in the United States.) In all fairness, they did not
have everything I needed so I also made a trip to Michaels. Almost everything I
purchased, I could have paid less for at Michaels.
I purchased polymer clay in three different colors. I used most of 3 packages of the main color (the door, and an accent color for the rock frame), and part of 1 package each of the others (2 colors for accent rocks). I started by cutting a pattern for my door.
After getting it rolled out to the correct size, I used a butter knife and the door template to cut out my door.
I used an old paint brush handle that had lost the bristles to create knot holes, and the knife to draw lines in the door to create a wood pattern.
I used some silver to cut out triangles to use for hinges.
I rolled out tiny balls for the rock door frame out of three colors. I placed them around the door, and pressed them flatter and together to create the frame. After I was done, I did notice some tiny holes where some of the "rocks" came together. I don't think it will cause problems, but time will tell. You can purchase liquid polymer clay that you could use like a grout, but that would have been another $7, so I chose to try it without. I also saw a tutorial that cut a flat frame out, and then they placed the rock on the flat frame to create a complete frame, given the effect of grout.
I also used my finger to rub pigment powder to the surface. The mica in the powder gives a pearlescent sheen to the door. Can you have fairies and no sparkle? I had this on hand in my rubber stamping supplies, so no extra cost there. Don't forget to check your craft stores before purchasing new products when starting a project.
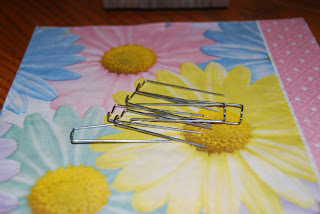
I got to wondering how I was going to get my door to stand up? Toothpicks!! I stuck the toothpicks in an interval I thought would give stability. But I began to worry they wouldn't be strong enough to stick in the ground. I tried to think of what else I had.
Of course! The floral pins I had bought to help secure the fairie furniture from blowing away in the wind!
So I stuck them right in.
I had clay left, so I also made some stepping stones by cutting circles out of the clay and stamping them with a pattern.
In the process, I had some extra door color so I made an additional door, as well as a small ball to create a door knob for an additional fairie home I was going to renovate. (More on that later.)
I baked according to package directions and here is the finished product.
I found this idea on another blog (I am afraid I did not save the site, and can not give credit where is credit is due. I really wanting a gazing ball, but did not want to spend $5 for a pre-made one. So I put out a call on Facebook for a golf tee (thanks Andrea) and bought a marble.
With a little hot glue, I had my gazing ball! (In case you were wondering, that glue gets REALLY hot!)
I wanted to add some color to my pre-purchased pots. I had some craft moss in my craft drawers. I added some hot glue to the pot, and just stuck some in.
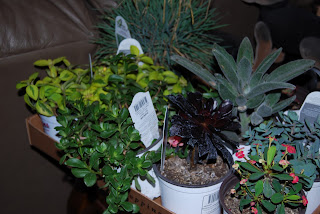
I also determined we needed some more color through plants! I was so happy to find a half price sale at another garden spot in town!
The next step was to put it all together!! I'll let the pics speak for themselves. I did by a fairie (I guess they don't just show up on their own) and a little bird bath.
One fairie garden I saw a picture of had swimming pool. I figured if I couldn't have one, my fairies could! I had plans to carve out a pool from the top of the trunk. The more I looked at the cut off top, and it's irregular shape, the idea came to me we needed a lake!
Cameron helped me nail some twigs from our yard to the edge of the stump to create a retaining wall. I added sea glass to give the effect of water. This was another of those purchases, that if I had more patience, it wouldn't cost me as much. You can order bulk sea glass online for a lot less. (http://www.save-on-crafts.com/vasgemmarsto.html - this is a great site I found for low prices on lots of craft items) On top of that, the craft stores were out of bulk (evidently wedding season had depleted their supply). I did find some in small qualities in a $1-$2 isle in Michaels. I used some other river rocks I had bought at the Dollar Tree and some large glass beads for filler. I found these chairs for a reasonable price at Johnsons.
If I have a lake, how can the fairie's not have a lake house!? Years ago Cameron found this old birdhouse in pretty run down condition. He fixed it up, with his dad's help to give to me as a gift. It has set on my front porch (much to his chagrin - he thought it should be in a tree so the birds would make a home out of it). I remodeled, adding a moss roof and turned what is now the door upside down. It went the other way, creating a round hole for the birds to enter through. But it made a perfect door turned upside down. I also hot glued a polymer clay bead I made for the door knob. I made a cross out of polymer clay to put in the window to make it more like a window, but didn't like how it turned out. I will work on that.
And the final product. One adjustment we had to make was cut out a space for the door from the trunk. That was the one thing about this project, and working with the tree stump (versus making a garden in old tub, or flower pot). I had originally thought I would stick the door in the ground using the floral pins I had baked in. In order to do that, the door stuck out too far from the stump. Roger used the chain saw to cut away the entrance and allow the door to be placed. I easily bent the pins back, creating a flat surface for the door to set on, giving more stability.
By the time I thought through everything, and kept adding embellishments, this took a couple of weeks. I never dreamt it would take so long, but I thought it was worth it! I love looking out the back door and seeing my new treasure. This is not any ordinary tree stump now. Nor is it a negative reminder of the majestic tree that once graced our back yard, but was lost to fire. It is a whimsical place, a reminder of what it is like to be a little girl, playing in an imaginary world in the back yard.


.JPG)
.JPG)


