Welcome

It's my life and I love it...most of the time.

Monday, September 2, 2013

Freezer Cooking 101


I decided I was going to stop pinning all of the Freezer Meals links on Pinterest, and finally do something about it. I had several pins linking to many processes of putting together a freezer meal cooking session. I looked at some of my own recipes and added many that sounded like something my family would like when deciding what to make. As I was finishing the initial cooking and putting together I thought I might have been a little ambitious as my mid-back started to ache. Of course, it could have just been my age creeping in again. I think I will definitely do it again, but am putting a good food processor and one of those memory foam mats for the kitchen on my Christmas list. I did use my mandolin (the kitchen tool, not the instrument), which did make some things easier, but would love to chop quickly.  

I did my shopping Saturday morning. I purchased the majority of my groceries at Aldi, with the majority of the meat coming from Dillons (Kroger), as it was on sale. The stew meat was not on sale. I will try to plan ahead next time, purchase a roast, and have it cut. It was a bit pricey. (But what meat isn’t anymore!) I spent $187, which included foil, freezer bags (These I did spend a little more on. Aldi’s tend to have pinholes in them. I purchased the Kroger brand, so compromised with the mid-priced bag.), and 4 foil pans from the Dollar Tree. They did not have exactly what I wanted; they are much deeper than I would have chosen. We will see how they do. This was better than paying $4-5 a pan.  I had all of the spices on hand, but will have to re-stock a few. That comes to $5.94 a meal. I am told the new recipes, and feel the same will hold true for my own recipes, will feed 3-4 adults with leftovers. The only recipe I am not sure will have leftovers is the Sausage and Peppers. But I could be wrong.
 
Monday morning (Labor Day), I started bright and early at 8 chopping all of my vegetables. I cooked 11 pounds of hamburger while I chopped. Next time, I will have a compiled list of how much of each vegetable I need chopped and sliced. As I put the recipes together, I realized I had missed a couple of preps. With the mushrooms, peppers, and sliced onions, I kept them separated by each, one cut. The chopped were all put together and I measured them at 1 cup per onion (tip from another blog), but ended up with about 2 ½ cups more left over. The quantities seemed ok as I added. I just froze the left over for other recipes.  

At about 11:30, I realized I had miss-counted how many chicken breasts I needed. (Or miss-understood how many were in the package. I used pre-frozen because they were over $1 a pound cheaper. I got 8 per bag I believe.) I kept moving forward. I went ahead and put everything else in the bags. After I was done with everything else, I made a mad dash to the store for some more chicken.  

On to the important part – the recipes: I may not have the exact size of cans, as they weren’t listed on the original recipes. I have already taken out the trash and am guessing on the size. But I think you will get the idea. All garlic is minced. 

Teriyaki Chicken

Bag Carrots – chopped                                                                  4 garlic cloves
Red onion – large chunks                                                             4 chicken breasts
2 -14 oz cans pineapple, with juice                                           1 c. teriyaki sauce

Combine, split between 2 bags, seal, mix.

Directions for bag: Add additional ¼ c. sauce to pot. Cook low 6-7 hours. Serve over hot rice. I found the bottle of sauce contained 1 ½ c. It was the typical size you see on the shelves.

Savory Chicken

4-6 chicken breasts                                                                       2 -14 oz. stew tomatoes
4 T. broth                                                                                        1 large onion, chopped
4 garlic cloves                                                                                 1 c. broth
Salt & Pepper
2 Bay Leaves                                                                                  4 c. broccoli (to be added during cooking)
 
Seal all but broccoli between 2 bags, mix.

Directions for bag: Cook low 6-7 hours. Add broccoli the last 30 minutes. Remove bay leaf before serving.

Update after cooking: We did not care for this dish. Not very flavorful. If you make, add seasoning, tomatoes and onion. I didn't think there were enough of them. We will make the second bag and try that before deciding whether to make again.

Chicken Cacciatore

4 chicken breasts                                                                             2 T. Italian Seasoning
1 large package mushrooms, sliced                                             4 cloves garlic
2 -6oz. cans tomato paste                                                              2 c. chicken broth

Split between 2 bags, mix. Open both ends of your paste, remove lid from one side. (tip: Push the paste out with the other lid.)  

Directions for bag: Add 1 c. broth. Cook low 6-7 hours. Serve over hot noodles with parmesan.

Chicken Enchiladas                                                                   Sauce

 3 c. cooked, chopped chicken (see roast chicken    2 T. Butter                           ½ onion, chopped
directions)                                                                        2 T. flour                              ½ c. broth
2 -4oz cans green chilies                                               1/4 c. milk                           Salt & Pepper
1 can black beans, rinsed                                              8 oz green chilies              ½ c. sour cream
1 pkg. cream cheese, cubed                                            (or tomatillo salsa)
Fajita size tortillas

Mix enchiladas ingredients, set aside. Sauté onion in butter. Take off of fire, and mix flour in. Add milk and broth, return to fire, stirring until thick and smooth. Add salt & pepper, chilies, and sour cream. (I like the sauce, and will double the sauce recipe next time.) Spray 9X9 (mine was actually more like 6X10ish) pan (which I forgot to do, whoops), layer sauce on bottom (which actually helps keep it from sticking). Fill tortilla with a large serving spoon full of filling, roll, and place in pan. Top with remaining sauce and shredded cheese. I made 12 enchilada’s, splitting between 2 pans. Bake at 400 degrees for 25-30 minutes.

Update after preparing: Yummy!

 Herb & Citrus Roast Chicken

 ¼ c. olive oil                                                                        1 t. onion powder
4 cloves garlic                                                                     ¼ t. crushed red pepper
2 T. sugar                                                                             Salt & Pepper
2 lemons, 1 juiced, 1 sliced                                               1 t. thyme
2 oranges, 1 juiced, 1 sliced                                              1 t. rosemary (I use about ½ this)
1 T. Italian season                                                               1 medium onion, sliced
1 t. paprika                                                                           10-12 pieces thigh and/or leg

Split between two bags. Combine all ingredients except the sliced fruit onion, and chicken. Place meat, and slices in freezer bag, pouring marinade over the top.

Directions for bag: Bake at 400 degrees for 45-min to 1 hour, until juices run clear. You could also crock pot it on low 6-8 hours, but it won’t brown nicely.

 Balsamic Chicken

4-6 chicken breasts                                                         ½ c. balsamic vinegar
2 can diced tomatoes                                                     1 T. olive oil
1 med. Onion, sliced                                                       1 t. ea. Oregano, basil
4 garlic cloves                                                                  ½ t. rosemary, thyme (I use less rosemary)
Salt & Pepper

Combine all ingredients in 2 bags.

Directions for bag: Cook on low in crock pot for 6-8 hours.

Update after preparing: 6-8 hours is too long for modern crock pots. I cooked with chicken frozen, for four hours on the lowest setting. Because of updated cooking standards, manufacturers had to increase how hot their cookers cook. It may be that mine just cooks extra hot, as at the lowest setting, liquids boil around the edges.

Cilantro Lime Chicken

6 breasts                                                                              4 garlic cloves
3 T. olive oil                                                                         1 red onion, chopped fine
2 limes, juiced                                                                     2 -14 oz. cans black beans, rinsed
2 c. cilantro                                                                          2 t. cumin
1 16 oz. bag frozen corn                                                    Salt & Pepper

Split between 2 bags.

Directions for bag: Cook low 8 hours in crock pot. (This seems like a long time compared to other recipes. I am going to go 6 and hope for the best.) Serve with tortillas. Dress with sour cream, guacamole, and cheese.

Honey Garlic Chicken

6-8 Leg & Thigh pieces                                                                   ½ c. honey bbq sauce
5 garlic cloves                                                                                 1/3 c. honey
1 t. oregano                                                                                      ¾ c. soy sauce
¼ c. ketchup                                                                                     Salt & Pepper

Combine, split between 2 bags.

Directions for bag: Cook low 6 hours.

Shredded Chicken for Enchiladas, and to freeze for two throw together meal, maybe Quesadilla’s and Chicken Salad.

2 whole hens                                                                                     4 celery
2 large onions                                                                                    Salt  & Pepper
4 large carrots

Cut vegetables in large chunks. Put vegetables on bottom of crock pot. Cook low for 8 hours. Debone after cooked and chop for other recipes. Drain broth from vegetables. Pour in ice cube trays, freeze, and pop into freezer bag for later use. It made 2 ¼ trays.

Lazy Day Stew

4 # Stew Meat                                                                                   1 -14 oz. cans tomato sauce
4 c. red potatoes, cubed (I used yellow)                                      2 T. brown sugar
4 t. corn starch                                                                                  4 c. baby carrots (I used large carrots)
Salt & Pepper                                                                                    2 onions, chopped
2 c. celery, chopped

Split between 2 bags.

Directions for bag: Add 1 c. water. Cook low 4-6 hours.

Sausage & Peppers

6 Italian sausage, chopped                                                           4 cloves garlic
2 green peppers, sliced                                                                 2 can Italian Diced Tomatoes (I used
                                                                                                 regular & added seasoning)
1 red pepper, sliced                                                                        2 T. Italian Seasoning
1 red onion, sliced

Split between 2 bags.

Directions for bag: Add drizzle of oil to crock. Cook low 6 hours. Serve over hot noodles or French bread Mozzarella cheese.

Spaghetti Sauce/Lasagna Sauce
 
4 # ground beef, brown                                                                2 c. onions, chopped
2 bell peppers, multi color, chopped                                         4 jars spaghetti sauce
2 cloves garlic
 
¼ recipe in two bags for spaghetti sauce. Add noodle of choice.

For Lasagna

Ricotta or 1 large fat free cottage cheese, with 2 beaten eggs, 2 T. parsley, and ½ c.
parmesan combined.

3 c. mozzarella, shredded

In 9X9 baking pan (mine was more 10 X 7 ish), layer sauce, lasagna noodles, cheese mix, sprinkle of
mozzarella, spaghetti sauce, layer two more times and end with layer of noodle, sauce, mozzarella.

Bake at 375, 25-30 minutes or according to your noodle directions. I use no boil noodles.

Pepper Steak

2 # round steak, sliced                                                                   1 large onion, sliced
30 oz can crushed tomatoes                                                        2 cloves garlic
2 green peppers, sliced                                                                 1 t. ginger
½ c soy sauce                                                                                   2 t. sugar
Salt & Pepper

Split between 2 bags. Freeze steak part way for easier slicing.

Directions for bag: cook low for 5-6 hours. Serve with rice.

Taco Soup

2 # hamburger, browned                                             2 -14 oz. cans kidney beans, rinsed
30 oz. can crushed tomatoes                                      2 -4 oz. cans green chilies
1 large onion, chopped                                                16 oz frozen corn
Cumin, chili powder, garlic, S&P                       2 -14 oz. cans black beans, rinsed

Split between 2 bags. There were no amounts of spices. I guessed at 2 t. each. May have to adjust as
it cooks.

Directions for bags: Add 1 c. water. Cook low 4-6 hours. Serve with chips, sour cream, cheese.

Update after preparing: 1 c. water is not enough to make a nice soup. I added 1 1/2 and it was still
more of a chili consistency after the first bowl. I will add 2 - 2 1/2 cups next time, and add more
spices.

Taco Meat

2 # hamburger, browned                                                             taco seasoning of choice

Cook, cool, split between 2 bags.

A couple of other tips:

I was not relishing chopping 30 garlic cloves. I bought a jar of already chopped garlic; we’ll see how the flavor is.

I used cereal containers (plastic containers to store your cereal in) and drink pitchers to hold the bags in place so I could fill them. The cereal containers worked the best. (This was not an original idea, but one I saw on a blog.)

After chopping everything, write with sharpie on your freezer bags the name of the recipe and any directions. This would be opposed to doing it ahead of time. This gives you a little break. If you are doing as large of a preparation as I did, I would split the bags up, taking another break after putting ½ together. Of course, if I had put on some good shoes like I thought I should, my back might not have ached as much as it did!

Ask the butcher to slice any meats that won’t be put together whole. Most will do it for free.

I find that the newer crock pots cook a lot hotter. If I put the chicken in frozen, it turns out much better. I am not sure how this will work with everything combined and frozen together. 

Know your crock pot! Depending on the age of your crock pot, it may cook a lot hotter than others. Cooking lengths may need to be adjusted. You may want to consider cooking at a hotter temperature with frozen chicken, and adjust the temperature down after the first hour.

One blogger stated she also baked in the oven sometimes at 350-375, 35-40 minutes.

Monday, August 13, 2012

Pinterest Projects - Household Tips

There are probably 1000's of household tips on Pinterest. I have almost 100 pinned myself. As the school year came to an end I thought how silly it was I pin all of things and then never try them. Trying some out fit right in to my summer goal "of accomplishing something". I selected a few to show you here.


One pin touted how easy it is to rub your faucets with waxed paper. This would purportedly put a layer of wax on the faucet that would keep the water spots away. I had to buy waxed paper, as I don't typically use it. I purchased the off brand to save on cost. On a Monday morning, I rubbed it onto our bathroom faucet.


It looked pretty good. It looked pretty good for several days actually. And then I realized my husband was out-of-town for work. His sink etiquette is mostly the culperate of water spots, etc. So for the next couple of days I purposely sprayed allowed droplets of water to fall on the faucet for a similiar effect of male use.


Unfortunatly, the waterspots stayed. I did not find that the waxed paper did the trick and will not try it again.


Another pin instructed to add 4-5 drops of essential oil to the inside of your paper towel roll. I chose Lavendar - a soothing scent. I found that it did smell for several hours. I think if I place more on the tube it may help with the longevity. I will also place some on both ends of the tube. I did not find that it released the scent as the roll was spun on the holder, however, as the post indicated.


Finally, I tried a tip to clean your mattress. The original post called for 1 cup of baking soda and 4 drops of essential oil (again I used Lavendar) mixed together. Simply dust the mattress using a kitchen sifter with the powder/oil mix. Let the powder sit on the mattress for at least an hour. I probably let it set for several. The final step is to vacuum up the mixture.


The pin stated that it would get rid of "dust mites and other nasty things". (I don't think I want to know what she was referencing.)  She also stated the baking soda helps draw up any moisture and deep dirtiness. It deodorizes and leaves the mattress smelling fresh and clean.

I have no way of knowing if it drew out any moisture or dirt, as our mattress did not show signs of this. I did find that it smelled fresh and clean. How much of that had to do with the fact I was also putting freshly laundered sheets on, I am not sure, as I get a similiar response when I put on clean sheets. But I do think it was a bit stronger then normal. It undoubtedly would have swept up any dust mites, but the mixture would not be required to achieve this. I will do this again, however, as it did smell good. I will add double the amount of lavendar next time, as I found the scent very faint.

Have you tried any of the Pinterest household tips or cleaning tips? Did they work?

Sunday, August 5, 2012

Are we losing sight? Thoughts on the Chick-Fil-A "controversy.".


I have been somewhat quietly watching all of the posts regarding the recent “Chick-Fil-A” controversy. I have pondered how to express myself, without offending any of my friends. As I am sure most of you do, I have a range of friends on Facebook. I have some from elementary, middle, and high school. I have some from my years at a Christian college. I have friends from work, church, parents of my children’s friends, and family. I think you get the idea that they are probably a diverse group – and they are. I have Christian friends and I have friends that don’t know what they believe about God. I have friends that are married, divorced, single, white, black, Asian, and yes, heterosexual and homosexual.

As I continue to read different media takes on the words of a business man, as well as people’s opinion on both sides of the fence, I feel I have to say something. These words from an article a friend shared swung me over the top. They come from a very articulate, intelligent person who happens to be gay. His name is Conor  Gaughan. For the full article in the Huffington Post, click the following link: http://www.huffingtonpost.com/conor-gaughan/chick-fil-a-homophobia_b_1711566.html .

“When we rant about the pastor who preaches that gays should be thrown into a concentration camp, we scream out of fear. And our fears are justified -- in the last seven days, a lesbian in Nebraska was carved with a knife, a gay man in Oklahoma was firebombed, and a girl in Kentucky was kicked and beaten -- her jaw broken and her teeth knocked out -- while her assailants allegedly hurled anti-gay slurs at her.”

I did not research the references he makes, but believe him knowing these things happen all too often, as I have read other similar stories over the years.

My purpose for sharing today is not to take sides, or to speak on anyone’s behalf other then my own. I do not need to explain God’s word, as it is right there in print for all to know his wishes. Just as it is in God’s hands to be the judge, not mine. The words Mr. Gaughan shared broke me to the core. These people’s actions, or re-actions, are not those of Jesus. Of this I feel confident. As I read these words, I was reminded of Jesus encounter with the Samaritan women at the well, John 4: 1-26. Jesus showed his love in his actions as he addressed a woman that no Jew would have spoken to, as well as in the kindness by the way he addressed her and, yes, even confronted her. Jesus is someone who loved all and wants us to as well. That should be all of our goals, not to be so caught up in our beliefs, feelings, or opinions that we forget how to treat each other.

I have worked hard to educate my family on acceptance as well as showing the love of Jesus because I believe that Jesus was sent to us because of love, and he showed us through example to love everyone. I John 4:7 reads, “Beloved, let us love one another, for love is of God; and everyone who loves is born of God, and knows God.” These last examples are only two of many that show the prevailing theme throughout the New Testament of God’s word – LOVE. Mathew 22:37-40 makes God’s greatest commands clear, Jesus replied: "Love the Lord your God with all your heart and with all your soul and with all your mind. This is the first and greatest commandment. And the second is like it: 'Love your neighbor as yourself.' All the Law and the Prophets hang on these two commandments."

I think in this era of political correctness, it has become all the harder to state our beliefs while keeping our head on our shoulders. All sides, whether we are discussing the family unit, or the President, must be respectful of each other. We must understand we have the God-given right to free will. We must respect the governments allowance for all to speak freely in our speech. The respect seems to be the real issue. I have seen many snide, sometimes disparaging remarks thrown towards each side, and not only this week. This makes me sad, as I believe it must surely make Jesus sad.

I would like to encourage all my friends to prayerfully consider my thoughts. Think before you speak. Think about how you wish “the other side” would not be hypocritical, by allowing you to express your feelings, thoughts, values, etc., even as they express theirs. And take the time to make sure you have read all of the facts before just taking a headline at face value. The following is the full news story by the Baptist Press on their interview with Mr. Cathy. http://www.bpnews.net/BPnews.asp?ID=38271 . Many posts and articles I have read infer Mr. Cathy’s words as hate, but I find no hate in his words. I hear a love of God as he shares his beliefs. You may agree or disagree with my interpretation, and that is the beauty of God’s wish for us as well as our governments: that we have free will to choose our beliefs and the right to express our beliefs, each and every one of us.

Monday, July 23, 2012

Pinterest Projects - Cooking Part 1

 Another favorite pinning topic on Pinterest is recipes. 1000's and 1000's of recipes. And I have almost 400 pinned myself (yikes!). June brings a birthday at our house, so what better reason to make a homemade cake! I love Italian Creme Cake, and found a recipe posted to Pinterest. When I went to the link, I was estatic to find it on the Pioneer Women's website! I loveeeee the Pioneer Women, Ree Drumond. I began following her at the beginning of the year when her new show started on The Food Network. It was fun to realize many of my co-workers enjoy her, too! We have great conversations at lunch about the things she makes.

In the spring, I was so glad to discover she would be coming to my town for a book signing! I arranged for "tickets" for several of us to go see her. I say "tickets" because they were free. They were really just to hold us a sit in the auditorium for her presentation. We arrived early and waited about an hour so we had good seats, which we did. She did a small presentation which was funny and enjoyable. We laughed as she told us a little more about herself and her life. We had a bit of a wait to get our cookbooks signed, but it really wasn't bad when you considered how many were there and that many brought/purchased multiple books to be signed. She really is gracious and I think very genuine.


She was very accomodating to everyone there, including us. She had to take pictures with us individually, then there was the group shot, then there were our mulitple books! But this post isn't about my adventures meeting Ree, but cooking!! Let's get back to the cake!


This cake has a lot of ingredients, but is really not hard to make. The recipe can be found in Ree Drummond's latest cookbook, The Pioneer Women Cooks: Food from My Frontier. I hope you don't mind, I don't like to post a recipe that isn't mine and can be found in a cookbook. I would be happy to share it with you if you ask, you can buy her wonderful cookbook, or you can go to Ree's website by clicking here for her Italian Creme Cake.

I will share some of the process with you.


One of the techniques used to make this cake is creating a merangue by whipping egg whites.


After transfering the egg whites, clean out the bowl and use it make the batter.


You then fold the egg whites into the batter. The batter is a bit lumpy. It looks like this in Ree's pics, too. If you aren't familiar with the Pioneer Women, one of the great things about her website and her cookbooks is she includes great pics. You know what everything should look like!


I divided the batter between 3 round cake pans for a nice high layer cake. (That's Ree's cookbook right next to the cake as it cools. I love it! I love her. Do you think it is a little weird I call her Ree? Me, too! But she just makes you feel that way, like you know her.)


For me, part of what makes this cake so wonderful is it's frosting. It contains cream cheese, which is not one of my husband's favorites (and it was his birthday), so I decided to make half butter frosting and half cream cheese. I used colored tooth picks pushed in the sides of the cake at the bottom to keep track of which side was which. I will never do it this way again. He said it was too sweet (I NEVER thought I would hear those words come from his mouth.). He has actually had a store bought version of this cake before, and I don't think he even realized it was cream cheese in the frosting - hmmmm.


I think it turned out really good. I will make it again if we are having people over. All of the kids couldn't come over for his birthday dinner, so there was a lot of cake. It is sooo different cooking for a few, after so many years cooking for 7; which at one time included 5 teenagers - 3 of them boys! I would also make it for a church pot luck.


Yumm! This makes me miss it!!


Do you have a favorite from scratch cake recipe? Does your husband insist he doesn't like something, only he eats it when he doesn't know what it is?


Sunday, July 15, 2012

Pinterest Projects - Fairie Gardens: Part 2

It's time to show you some of the tips I picked up while trying to decide what I wanted to do with my new Fairie Garden. The Internet is an amazing place, and I continue to use Pinterest for inspiration.

(First, here's a little sneak peak of what I accomplished by making many of my own features.)


One of the struggles I had was finding just the right door for my Fairies to enter into their new home. I didn't relish paying $25 for the doors that came the closest to what I wanted. I did find some on eBay and Etsy that I could purchase. They were handmade, and could be made to order. Wait a minute. Handmade? If they were handmade, why couldn't it be my hands to make it!? I found several tutorials online that were helpful.

I made a trip to Hobby Lobby to buy some essentials. (I like to frequent Hobby Lobby as I respect the fact they are closed on Sunday's so their employees can go to church and spend time with family; a philosophy that has almost disappeared in the United States.) In all fairness, they did not have everything I needed so I also made a trip to Michaels. Almost everything I purchased, I could have paid less for at Michaels.

I purchased polymer clay in three different colors. I used most of 3 packages of the main color (the door, and an accent color for the rock frame), and part of 1 package each of the others (2 colors for accent rocks). I started by cutting a pattern for my door.

I began working the clay. This took awhile. Remember how I mentioned patience was not one of my virtues? At one point I thought, what was I thinking. Why didn't I just buy a door! I used my hands to knead the clay, and a rolling pin to flatten it it. This was such a large piece it took awhile. If I were to continue making polymer clay things, I would definitely invest in a dedicated pasta machine to roll out the clay. This would be a good time to mention after I started working the clay, I read some information that says you should not use tools for cooking after using them on the clay. I would have chosen something else to roll this out on had I read it first. I also found that the clay stuck to the cutting mat. I switched to aluminum foil and had much better luck.

After getting it rolled out to the correct size, I used a butter knife and the door template to cut out my door.

I used an old paint brush handle that had lost the bristles to create knot holes, and the knife to draw lines in the door to create a wood pattern.

I used some silver to cut out triangles to use for hinges.

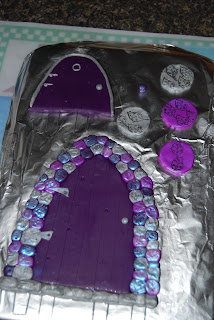
I rolled out tiny balls for the rock door frame out of three colors. I placed them around the door, and pressed them flatter and together to create the frame. After I was done, I did notice some tiny holes where some of the "rocks" came together. I don't think it will cause problems, but time will tell. You can purchase liquid polymer clay that you could use like a grout, but that would have been another $7, so I chose to try it without. I also saw a tutorial that cut a flat frame out, and then they placed the rock on the flat frame to create a complete frame, given the effect of grout.


I also used my finger to rub pigment powder to the surface. The mica in the powder gives a pearlescent sheen to the door. Can you have fairies and no sparkle? I had this on hand in my rubber stamping supplies, so no extra cost there. Don't forget to check your craft stores before purchasing new products when starting a project.

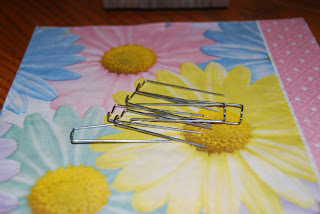
I got to wondering how I was going to get my door to stand up? Toothpicks!! I stuck the toothpicks in an interval I thought would give stability. But I began to worry they wouldn't be strong enough to stick in the ground. I tried to think of what else I had.

Of course! The floral pins I had bought to help secure the fairie furniture from blowing away in the wind!

So I stuck them right in.


I had clay left, so I also made some stepping stones by cutting circles out of the clay and stamping them with a pattern.

In the process, I had some extra door color so I made an additional door, as well as a small ball to create a door knob for an additional fairie home I was going to renovate. (More on that later.)

I baked according to package directions and here is the finished product.

I found this idea on another blog (I am afraid I did not save the site, and can not give credit where is credit is due. I really wanting a gazing ball, but did not want to spend $5 for a pre-made one. So I put out a call on Facebook for a golf tee (thanks Andrea) and bought a marble.


With a little hot glue, I had my gazing ball! (In case you were wondering, that glue gets REALLY hot!)


I wanted to add some color to my pre-purchased pots. I had some craft moss in my craft drawers. I added some hot glue to the pot, and just stuck some in.


Easy, peasy. Remember when I said check your supplies before buying new products? Never in a million years would I have thought I had moss at home, so I bought some I needed for this and my fairie home renovations. And then I found this moss, after I had already opened the other package. Uggg.

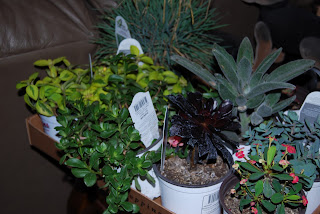
I also determined we needed some more color through plants! I was so happy to find a half price sale at another garden spot in town!

The next step was to put it all together!! I'll let the pics speak for themselves. I did by a fairie (I guess they don't just show up on their own) and a little bird bath.


One fairie garden I saw a picture of had swimming pool. I figured if I couldn't have one, my fairies could! I had plans to carve out a pool from the top of the trunk. The more I looked at the cut off top, and it's irregular shape, the idea came to me we needed a lake!

Cameron helped me nail some twigs from our yard to the edge of the stump to create a retaining wall. I added sea glass to give the effect of water. This was another of those purchases, that if I had more patience, it wouldn't cost me as much. You can order bulk sea glass online for a lot less. (http://www.save-on-crafts.com/vasgemmarsto.html - this is a great site I found for low prices on lots of craft items) On top of that, the craft stores were out of bulk (evidently wedding season had depleted their supply). I did find some in small qualities in a $1-$2 isle in Michaels. I used some other river rocks I had bought at the Dollar Tree and some large glass beads for filler. I found these chairs for a reasonable price at Johnsons.

If I have a lake, how can the fairie's not have a lake house!? Years ago Cameron found this old birdhouse in pretty run down condition. He fixed it up, with his dad's help to give to me as a gift. It has set on my front porch (much to his chagrin - he thought it should be in a tree so the birds would make a home out of it). I remodeled, adding a moss roof and turned what is now the door upside down. It went the other way, creating a round hole for the birds to enter through. But it made a perfect door turned upside down. I also hot glued a polymer clay bead I made for the door knob. I made a cross out of polymer clay to put in the window to make it more like a window, but didn't like how it turned out. I will work on that.


And the final product. One adjustment we had to make was cut out a space for the door from the trunk. That was the one thing about this project, and working with the tree stump (versus making a garden in old tub, or flower pot). I had originally thought I would stick the door in the ground using the floral pins I had baked in. In order to do that, the door stuck out too far from the stump. Roger used the chain saw to cut away the entrance and allow the door to be placed. I easily bent the pins back, creating a flat surface for the door to set on, giving more stability.


By the time I thought through everything, and kept adding embellishments, this took a couple of weeks. I never dreamt it would take so long, but I thought it was worth it! I love looking out the back door and seeing my new treasure. This is not any ordinary tree stump now. Nor is it a negative reminder of the majestic tree that once graced our back yard, but was lost to fire. It is a whimsical place, a reminder of what it is like to be a little girl, playing in an imaginary world in the back yard.